書きかけの記事です。
リンクなど自由にしていただいて構いませんが、ヘディングの ID などがコロコロ変わりますのでご注意ください。
ニューラルネットワークを構築するNNモジュールの畳み込み系のクラスを検証していきます。
検証に使用するコードは下記です。
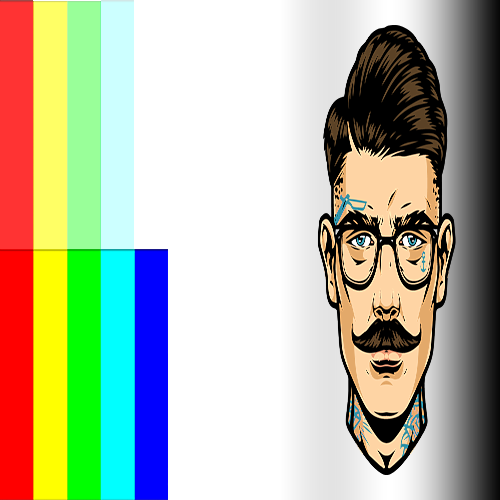
画像を読み込んでニューラルネットワークの各層が何を行っているかを見ていきます。
import os
from PIL import Image, ImageFilter
import torchvision.transforms.functional as TF

img_path = 'images/test.png'
img = Image.open(img_path)

filename = os.path.splitext(os.path.basename(img_path))[0]

# Tensor型へ変換
img = TF.to_tensor(img)

print(img.shape)

# ミニバッチの形に変換
img = img.reshape(1, img.shape[0], img.shape[1], img.shape[2])

print('\n--- ミニバッチの形に変換 ---\n')
print(img.shape)
torch.Size([4, 600, 1500])

--- ミニバッチの形に変換 ---

torch.Size([1, 4, 600, 1500])
PyTorch Lightning の nn モジュールを使用するにはミニバッチの形にする必要があるため、通常の画像の配列に1次元足しています。
torch.nn.Conv2d | 畳み込み層
画像の畳み込みを行うコマンドです。
conv = nn.Conv2d(in_channels=1, out_channels=4, kernel_size=3, stride=1, padding=1)
| パラメーター | 値 | 内容 | 初期値 |
|---|
| in_channels | int | グレースケール:1 | |
| | カラー画像:3 | |
| | 透過画像:4 | |
| out_Channnels | int | 出力のチャンネル数 | |
| kernel_size | int / tuple | フィルタ(カーネル)のサイズ | |
| stride | int / tuple | フィルタを動かす幅 | 1 |
| padding | int / tuple / str | パディングの数 | 0 |
| padding_mode | str | 'zeros', 'reflect', 'default', 'replicate', 'circular' | 'zeros' |
| dilation | int / tuple | カーネル要素間の間隔 | 1 |
画像サイズの計算
$$\LARGE O_h = \frac{ I_h + 2P - D(F_h - 1) -1 }{ S } + 1$$
$$\LARGE O_w = \frac{ I_w + 2P - D(F_w - 1) -1 }{ S } + 1$$
| \( I_h \) | 入力画像の高さ |
| \( F_h \) | フィルタの高さ |
| \( O_h \) | 出力画像の高さ |
| \( P \) | パディング幅 |
| \(D\) | デュレーション |
関数にすると下記のようになります。
| \( I_w \) | 入力画像の横幅 |
| \( F_w \) | フィルタの横幅 |
| \( O_w \) | 出力画像の横幅 |
| \( S \) | ストライド |
# conv2d の画像サイズの計算
def calc_out_image(size, kernel_size, padding=0, stride=1, dilation=1):
    out_image_size = size  + 2 * padding - dilation * (kernel_size - 1) - 1
    out_image_size = out_image_size / stride + 1
    return int(out_image_size)
検証コード
import os
from PIL import Image, ImageFilter
import torch.nn as nn
import torch.nn.functional as F
from torchvision import transforms
import torchvision.transforms.functional as TF

# 画像の読み込み
img_path = 'images/test_00.png'
img = Image.open(img_path)
file_name = os.path.splitext(os.path.basename(img_path))[0]

# Tensor型へ変換
img = TF.to_tensor(img)

# ミニバッチの形に変換
img = img.reshape(1, img.shape[0], img.shape[1], img.shape[2])

print(img.shape)

# 画像の保存
def save_images(imgs, category):

    # 画像データの保存先
    dir = 'images'

    # ディレクトリの作成
    if not os.path.isdir(dir):
        os.makedirs(dir)

    for img in imgs:

        # PIL.Image に変換して保存
        pil_img = TF.to_pil_image(img)
        pil_img.save(dir + '/' + category + '_' + file_name + '.png')


def calc_out_image(size, kernel_size, stride=1, padding=0, dilation=1):
    out_image_size = size  + 2 * padding - dilation * (kernel_size - 1) - 1
    out_image_size = out_image_size / stride + 1
    return int(out_image_size)

height = 500
width  = 1000
in_channels = 4
out_channels = 4
kernel_size = 3
stride = 1
padding = 0


# 畳み込み層
conv = nn.Conv2d(
    in_channels=in_channels,
    out_channels=out_channels,
    kernel_size=kernel_size,
    stride=stride,
    padding=padding,
)

conved_img = conv(img)

save_images(conved_img, 'conved')

print('畳み込み後')
print(conved_img.shape)


print('縦 : ', calc_out_image(
    height,
    kernel_size,
    stride,
    padding,

))

print('横 : ', calc_out_image(
    width,
    kernel_size,
    stride,
    padding,
))
Conv2d の中身を確認する
Conv2d は作成時にランダムで重みを作ります。
import torch.nn as nn
import torch.nn.functional as F

# 畳み込み層の定義
conv2d = nn.Conv2d(
    in_channels=1,
    out_channels=3,
    kernel_size=3,
    stride=1,
    padding=1
)

print('print  : ', conv2d)
print('type   : ', type(conv2d))
print('\n------------------\n')
print('\nweight :\n', conv2d.weight)
print('\nweight.shape : ', conv2d.weight.shape)
print('\n\n------------------\n')
print('\nbias :\n', conv2d.bias)
print('\nbias.shape : ', conv2d.bias.shape)
print  :  Conv2d(1, 3, kernel_size=(3, 3), stride=(1, 1), padding=(1, 1))
type   :  <class 'torch.nn.modules.conv.Conv2d'>

------------------


weight :
 Parameter containing:
tensor([[[[-0.1887, -0.2283,  0.1434],
          [-0.0796, -0.0402, -0.0663],
          [ 0.2534,  0.0306,  0.0081]]],


        [[[-0.3128, -0.0345, -0.0841],
          [-0.2603, -0.1021, -0.2946],
          [-0.2957, -0.1447,  0.2846]]],


        [[[-0.3121, -0.0799, -0.0086],
          [-0.3232, -0.0291, -0.1523],
          [ 0.1764,  0.1116, -0.1242]]]], requires_grad=True)

weight.shape :  torch.Size([3, 1, 3, 3])


------------------


bias :
 Parameter containing:
tensor([-0.0745, -0.2802,  0.2253], requires_grad=True)

bias.shape :  torch.Size([3])
カーネルを5にした結果
import torch.nn as nn
import torch.nn.functional as F

# 畳み込み層の定義
conv2d = nn.Conv2d(
    in_channels=1,
    out_channels=3,
    kernel_size=5,
    stride=1,
    padding=1
)

print('print  : ', conv2d)
print('type   : ', type(conv2d))
print('\n------------------\n')
print('\nweight :\n', conv2d.weight)
print('\nweight.shape : ', conv2d.weight.shape)
print('\n\n------------------\n')
print('\nbias :\n', conv2d.bias)
print('\nbias.shape : ', conv2d.bias.shape)
print  :  Conv2d(1, 3, kernel_size=(5, 5), stride=(1, 1), padding=(1, 1))
type   :  <class 'torch.nn.modules.conv.Conv2d'>

------------------


weight :
 Parameter containing:
tensor([[[[-0.1678,  0.0522, -0.0288, -0.0518,  0.1186],
          [-0.0008,  0.1937,  0.0191, -0.1008,  0.1465],
          [ 0.1158,  0.1457,  0.0815,  0.0341,  0.1099],
          [-0.1348, -0.0243, -0.1872, -0.0349, -0.1003],
          [ 0.1278,  0.0087,  0.1417,  0.0057,  0.1993]]],


        [[[ 0.0920, -0.0985,  0.1697, -0.1354,  0.1860],
          [-0.0864,  0.0492, -0.0261, -0.1807, -0.0284],
          [ 0.0646,  0.0160,  0.1647,  0.1653, -0.0045],
          [ 0.0659, -0.0638,  0.0446,  0.1366, -0.0828],
          [-0.0547, -0.1855,  0.0457,  0.1967, -0.1850]]],


        [[[-0.0341, -0.0719, -0.1328, -0.1780, -0.1419],
          [-0.1079,  0.1131, -0.0050,  0.1193, -0.1931],
          [-0.0559, -0.1899, -0.0582,  0.1958, -0.1408],
          [ 0.0440, -0.0221,  0.0281, -0.1219, -0.0129],
          [ 0.1782,  0.0576, -0.0235, -0.1339, -0.1788]]]], requires_grad=True)

weight.shape :  torch.Size([3, 1, 5, 5])


------------------


bias :
 Parameter containing:
tensor([-0.0042, -0.0398,  0.1660], requires_grad=True)

bias.shape :  torch.Size([3])
in_Channnels | 入力チャンネル
入力する画像のチャンネル数です。
入力時は画像のチャンネル数をそのまま入力する必要があります。
1チャンネルの畳み込み層に4チャンネルの画像を入れようとするとエラーで止まります。
このため、ニューラルネットワークに入れる前に画像のチャンネル数を統一しておく必要があります。
4チャンネルの画像を1チャンネルで入力しようとしたとき
import os
import torch.nn as nn
import torchvision.transforms.functional as TF
from PIL import Image

img_path = 'images/test.png'
img = Image.open(img_path)

file_name = os.path.splitext(os.path.basename(img_path))[0]

# Tensor型へ変換
img = TF.to_tensor(img)

# ミニバッチの形に変換
img = img.reshape(1, img.shape[0], img.shape[1], img.shape[2])

print(img.shape)

# 4チャンネル存在する
# -> torch.Size([1, 4, 600, 1500])

# 畳み込み
conv2d = nn.Conv2d(
    in_channels=1,
    out_channels=4,
    kernel_size=7,
    stride=1,
    padding=3
)

# ここでエラー
conved_img = conv2d(img)

# 1チャンネルの畳み込み層に4チャンネルの画像を入れようとしたため
out_channels | 出力チャンネル
出力するチャンネル数を指定します。
2のべき乗で増やしていくパターンが多いです。
1ch → 1ch
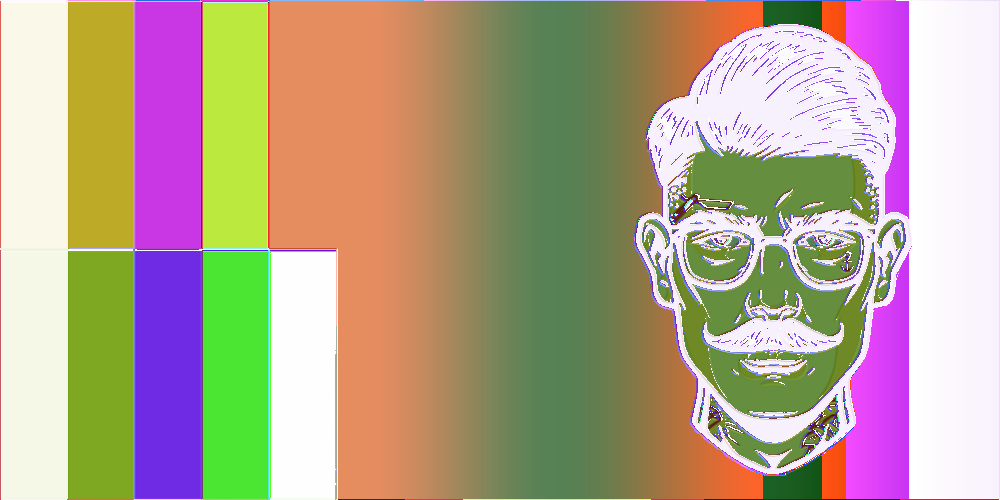
1チャンネルへの変換の場合、そこまで情報が変わりません。
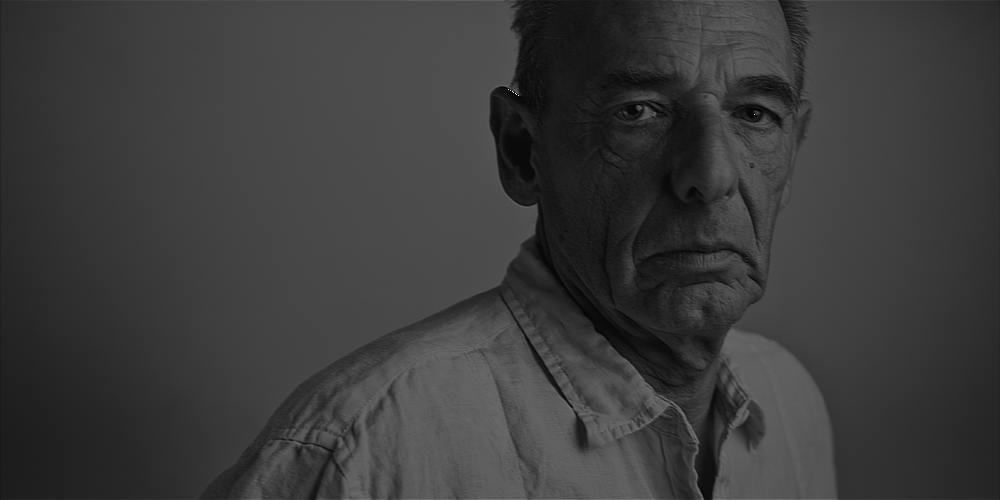
読み込んだ画像が下記の画像です。ほぼ変化のない画像も生成されます。

検証コード
import os
from PIL import Image, ImageFilter
import torch.nn as nn
import torch.nn.functional as F
from torchvision import transforms
import torchvision.transforms.functional as TF

# 画像の読み込み
img_path = 'images/test_08.png'
img = Image.open(img_path)
file_name = os.path.splitext(os.path.basename(img_path))[0]

# Tensor型へ変換
img = TF.to_tensor(img)

# ミニバッチの形に変換
img = img.reshape(1, img.shape[0], img.shape[1], img.shape[2])

print(img.shape)

# 画像の保存
def save_images(imgs, category):

    # 画像データの保存先
    dir = 'images'

    # ディレクトリの作成
    if not os.path.isdir(dir):
        os.makedirs(dir)

    for img in imgs:

        # PIL.Image に変換して保存
        pil_img = TF.to_pil_image(img)
        pil_img.save(dir + '/' + category + '_' + file_name + '.png')

# 畳み込み層
conv = nn.Conv2d(
    in_channels=1,
    out_channels=4,
    kernel_size=3,
    stride=1,
    padding=1
)

conved_img = conv(img)

save_images(conved_img, 'conved')

print('畳み込み後')
print(conved_img.shape)
1ch → 3ch
検証コード
import os
from PIL import Image, ImageFilter
import torch.nn as nn
import torch.nn.functional as F
from torchvision import transforms
import torchvision.transforms.functional as TF

# 画像の読み込み
img_path = 'images/test_08.png'
img = Image.open(img_path)
file_name = os.path.splitext(os.path.basename(img_path))[0]

# Tensor型へ変換
img = TF.to_tensor(img)

# ミニバッチの形に変換
img = img.reshape(1, img.shape[0], img.shape[1], img.shape[2])

print(img.shape)

# 画像の保存
def save_images(imgs, category):

    # 画像データの保存先
    dir = 'images'

    # ディレクトリの作成
    if not os.path.isdir(dir):
        os.makedirs(dir)

    for img in imgs:

        # PIL.Image に変換して保存
        pil_img = TF.to_pil_image(img)
        pil_img.save(dir + '/' + category + '_' + file_name + '.png')

# 畳み込み層
conv = nn.Conv2d(
    in_channels=1,
    out_channels=3,
    kernel_size=3,
    stride=1,
    padding=1
)

conved_img = conv(img)

save_images(conved_img, 'conved')

print('畳み込み後')
print(conved_img.shape)
1ch → 4ch
検証コード
import os
from PIL import Image, ImageFilter
import torch.nn as nn
import torch.nn.functional as F
from torchvision import transforms
import torchvision.transforms.functional as TF

# 画像の読み込み
img_path = 'images/test_08.png'
img = Image.open(img_path)
file_name = os.path.splitext(os.path.basename(img_path))[0]

# Tensor型へ変換
img = TF.to_tensor(img)

# ミニバッチの形に変換
img = img.reshape(1, img.shape[0], img.shape[1], img.shape[2])

print(img.shape)

# 画像の保存
def save_images(imgs, category):

    # 画像データの保存先
    dir = 'images'

    # ディレクトリの作成
    if not os.path.isdir(dir):
        os.makedirs(dir)

    for img in imgs:

        # PIL.Image に変換して保存
        pil_img = TF.to_pil_image(img)
        pil_img.save(dir + '/' + category + '_' + file_name + '.png')

# 畳み込み層
conv = nn.Conv2d(
    in_channels=1,
    out_channels=4,
    kernel_size=3,
    stride=1,
    padding=1
)

conved_img = conv(img)

save_images(conved_img, 'conved')

print('畳み込み後')
print(conved_img.shape)
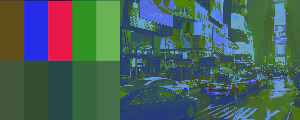
4ch → 1ch

torch.Size([1, 4, 500, 1000])
畳み込み後
torch.Size([1, 1, 500, 1000])
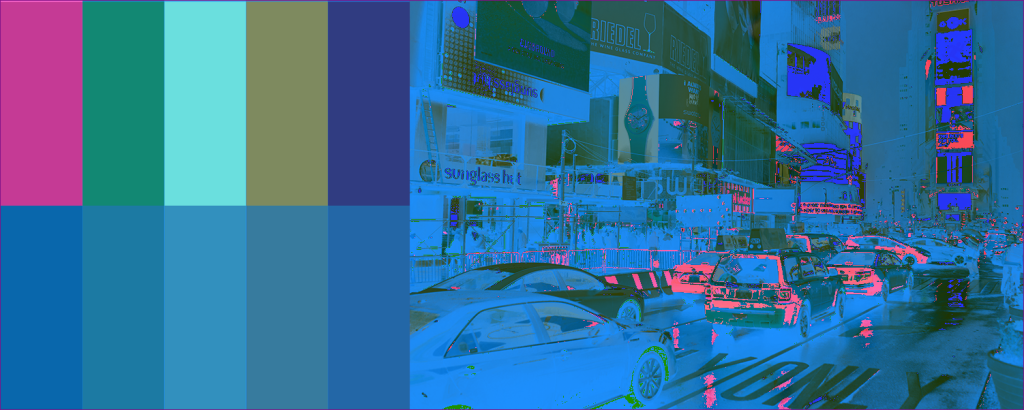
読み込んだ画像は下記の画像です。
情報量が 4分の1に減るため、特徴も出にくくなっています。

検証コード
import os
from PIL import Image, ImageFilter
import torch.nn as nn
import torch.nn.functional as F
from torchvision import transforms
import torchvision.transforms.functional as TF

# 画像の読み込み
img_path = 'images/test_00.png'
img = Image.open(img_path)
file_name = os.path.splitext(os.path.basename(img_path))[0]

# Tensor型へ変換
img = TF.to_tensor(img)

# ミニバッチの形に変換
img = img.reshape(1, img.shape[0], img.shape[1], img.shape[2])

print(img.shape)

# 画像の保存
def save_images(imgs, category):

    # 画像データの保存先
    dir = 'images'

    # ディレクトリの作成
    if not os.path.isdir(dir):
        os.makedirs(dir)

    for img in imgs:

        # PIL.Image に変換して保存
        pil_img = TF.to_pil_image(img)
        pil_img.save(dir + '/' + category + '_' + file_name + '.png')

# 畳み込み層
conv = nn.Conv2d(
    in_channels=4,
    out_channels=1,
    kernel_size=3,
    stride=1,
    padding=1
)

conved_img = conv(img)

save_images(conved_img, 'conved')

print('畳み込み後')
print(conved_img.shape)
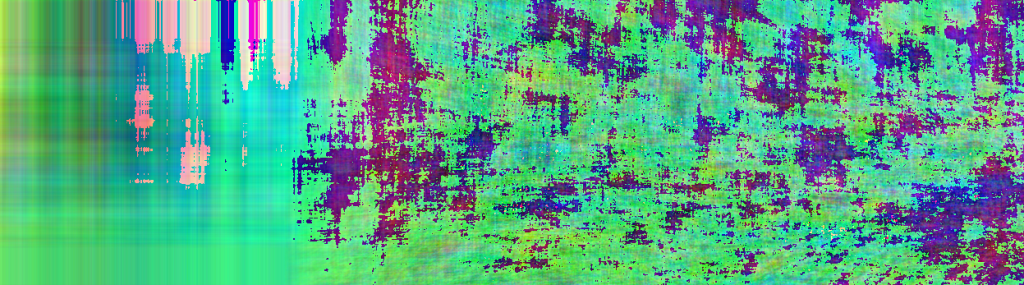
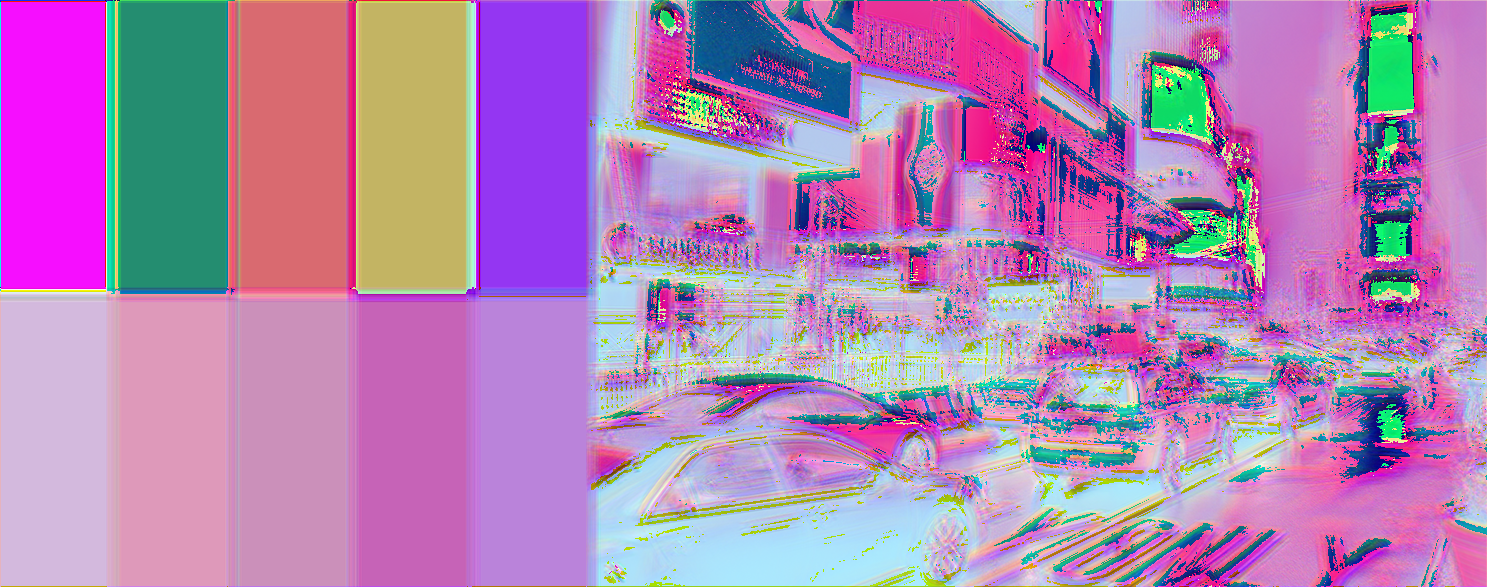
4ch → 3ch
torch.Size([1, 4, 500, 1000])
畳み込み後
torch.Size([1, 3, 500, 1000])
検証コード
import os
from PIL import Image, ImageFilter
from torchvision import transforms
import torchvision.transforms.functional as TF


img_path = 'images/test_01.png'
img = Image.open(img_path)

file_name = os.path.splitext(os.path.basename(img_path))[0]

# Tensor型へ変換
img = TF.to_tensor(img)

# ミニバッチの形に変換
img = img.reshape(1, img.shape[0], img.shape[1], img.shape[2])

print(img.shape)


def save_images(imgs, category):
    dir = 'images'

    # ディレクトリの作成
    if not os.path.isdir(dir):
        os.makedirs(dir)

    for img in imgs:

        # PIL.Image に変換して保存
        pil_img = TF.to_pil_image(img)
        pil_img.save(dir + '/' + category + '_' + file_name + '.png')


import torch.nn as nn
import torch.nn.functional as F

# 畳み込み層の定義
conv2d = nn.Conv2d(
    in_channels=4,
    out_channels=3,
    kernel_size=3,
    stride=1,
    padding=1
)

conved_img = conv2d(img)

save_images(conved_img, 'conved')

print('畳み込み後')
print(conved_img.shape)
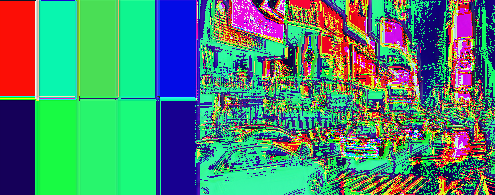
4ch → 4ch
torch.Size([1, 4, 500, 1000])
畳み込み後
torch.Size([1, 4, 500, 1000])
検証コード
import os
from PIL import Image, ImageFilter
import torch.nn as nn
import torch.nn.functional as F
from torchvision import transforms
import torchvision.transforms.functional as TF

# 画像の読み込み
img_path = 'images/test_00.png'
img = Image.open(img_path)
file_name = os.path.splitext(os.path.basename(img_path))[0]

# Tensor型へ変換
img = TF.to_tensor(img)

# ミニバッチの形に変換
img = img.reshape(1, img.shape[0], img.shape[1], img.shape[2])

print(img.shape)

# 画像の保存
def save_images(imgs, category):

    # 画像データの保存先
    dir = 'images'

    # ディレクトリの作成
    if not os.path.isdir(dir):
        os.makedirs(dir)

    for img in imgs:

        # PIL.Image に変換して保存
        pil_img = TF.to_pil_image(img)
        pil_img.save(dir + '/' + category + '_' + file_name + '.png')

# 畳み込み層
conv = nn.Conv2d(
    in_channels=4,
    out_channels=4,
    kernel_size=3,
    stride=1,
    padding=1
)

conved_img = conv(img)

save_images(conved_img, 'conved')

print('畳み込み後')
print(conved_img.shape)
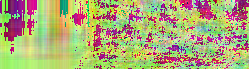
kernel_size | カーネル(フィルター)
値を上げた場合に起こることは下記です。
- 大まかな情報を強調する(限度はある)
- 細かい情報が削られる
- 解像度が削られる
- 計算時間が増える
適正値は解像度によって変動します。
kernel_size = 1
torch.Size([1, 4, 600, 1500])
畳み込み後
torch.Size([1, 3, 600, 1500])
検証コード
import os
from PIL import Image, ImageFilter
import torch.nn as nn
import torch.nn.functional as F
from torchvision import transforms
import torchvision.transforms.functional as TF

# 画像の読み込み
img_path = 'images/test_01.png'
img = Image.open(img_path)
file_name = os.path.splitext(os.path.basename(img_path))[0]

# Tensor型へ変換
img = TF.to_tensor(img)

# ミニバッチの形に変換
img = img.reshape(1, img.shape[0], img.shape[1], img.shape[2])

print(img.shape)

# 画像の保存
def save_images(imgs, category):

    # 画像データの保存先
    dir = 'images'

    # ディレクトリの作成
    if not os.path.isdir(dir):
        os.makedirs(dir)

    for img in imgs:

        # PIL.Image に変換して保存
        pil_img = TF.to_pil_image(img)
        pil_img.save(dir + '/' + category + '_' + file_name + '.png')

# 畳み込み層
conv = nn.Conv2d(
    in_channels=4,
    out_channels=3,
    kernel_size=1,
    stride=1,
    padding=0
)

conved_img = conv(img)

save_images(conved_img, 'conved')

print('畳み込み後')
print(conved_img.shape)
kernel_size = 16
torch.Size([1, 4, 600, 1500])
畳み込み後
torch.Size([1, 3, 587, 1487])
検証コード
import os
from PIL import Image, ImageFilter
import torch.nn as nn
import torch.nn.functional as F
from torchvision import transforms
import torchvision.transforms.functional as TF

# 画像の読み込み
img_path = 'images/test_01.png'
img = Image.open(img_path)
file_name = os.path.splitext(os.path.basename(img_path))[0]

# Tensor型へ変換
img = TF.to_tensor(img)

# ミニバッチの形に変換
img = img.reshape(1, img.shape[0], img.shape[1], img.shape[2])

print(img.shape)

# 画像の保存
def save_images(imgs, category):

    # 画像データの保存先
    dir = 'images'

    # ディレクトリの作成
    if not os.path.isdir(dir):
        os.makedirs(dir)

    for img in imgs:

        # PIL.Image に変換して保存
        pil_img = TF.to_pil_image(img)
        pil_img.save(dir + '/' + category + '_' + file_name + '.png')

# 畳み込み層
conv = nn.Conv2d(
    in_channels=4,
    out_channels=3,
    kernel_size=16,
    stride=1,
    padding=1
)

conved_img = conv(img)

save_images(conved_img, 'conved')

print('畳み込み後')
print(conved_img.shape)
kernel_size = 256
torch.Size([1, 4, 600, 1500])
畳み込み後
torch.Size([1, 3, 347, 1247])
このサイズの画像にこの大きさのフィルタをかけるとかなり時間がかかるようになります。
検証コード
import os
from PIL import Image, ImageFilter
import torch.nn as nn
import torch.nn.functional as F
from torchvision import transforms
import torchvision.transforms.functional as TF

# 画像の読み込み
img_path = 'images/test_01.png'
img = Image.open(img_path)
file_name = os.path.splitext(os.path.basename(img_path))[0]

# Tensor型へ変換
img = TF.to_tensor(img)

# ミニバッチの形に変換
img = img.reshape(1, img.shape[0], img.shape[1], img.shape[2])

print(img.shape)

# 画像の保存
def save_images(imgs, category):

    # 画像データの保存先
    dir = 'images'

    # ディレクトリの作成
    if not os.path.isdir(dir):
        os.makedirs(dir)

    for img in imgs:

        # PIL.Image に変換して保存
        pil_img = TF.to_pil_image(img)
        pil_img.save(dir + '/' + category + '_' + file_name + '.png')

# 畳み込み層
conv = nn.Conv2d(
    in_channels=4,
    out_channels=3,
    kernel_size=256,
    stride=1,
    padding=1
)

conved_img = conv(img)

save_images(conved_img, 'conved')

print('畳み込み後')
print(conved_img.shape)
stride | スライド
値を上げていくと計算は早くなりますが、解像度が目減りします。
ここでも情報量が削られます。
karnel_size = 16 , stride = 3
torch.Size([1, 4, 600, 1500])
畳み込み後
torch.Size([1, 3, 195, 495])
検証コード
import os
from PIL import Image, ImageFilter
import torch.nn as nn
import torch.nn.functional as F
from torchvision import transforms
import torchvision.transforms.functional as TF

# 画像の読み込み
img_path = 'images/test_01.png'
img = Image.open(img_path)
file_name = os.path.splitext(os.path.basename(img_path))[0]

# Tensor型へ変換
img = TF.to_tensor(img)

# ミニバッチの形に変換
img = img.reshape(1, img.shape[0], img.shape[1], img.shape[2])

print(img.shape)

# 画像の保存
def save_images(imgs, category):

    # 画像データの保存先
    dir = 'images'

    # ディレクトリの作成
    if not os.path.isdir(dir):
        os.makedirs(dir)

    for img in imgs:

        # PIL.Image に変換して保存
        pil_img = TF.to_pil_image(img)
        pil_img.save(dir + '/' + category + '_' + file_name + '.png')

# 畳み込み層
conv = nn.Conv2d(
    in_channels=4,
    out_channels=3,
    kernel_size=16,
    stride=3,
    padding=0
)

conved_img = conv(img)

save_images(conved_img, 'conved')

print('畳み込み後')
print(conved_img.shape)
karnel_size = 1 , stride = 5
torch.Size([1, 4, 600, 1500])
畳み込み後
torch.Size([1, 3, 195, 495])
検証コード
import os
from PIL import Image, ImageFilter
import torch.nn as nn
import torch.nn.functional as F
from torchvision import transforms
import torchvision.transforms.functional as TF

# 画像の読み込み
img_path = 'images/test_01.png'
img = Image.open(img_path)
file_name = os.path.splitext(os.path.basename(img_path))[0]

# Tensor型へ変換
img = TF.to_tensor(img)

# ミニバッチの形に変換
img = img.reshape(1, img.shape[0], img.shape[1], img.shape[2])

print(img.shape)

# 画像の保存
def save_images(imgs, category):

    # 画像データの保存先
    dir = 'images'

    # ディレクトリの作成
    if not os.path.isdir(dir):
        os.makedirs(dir)

    for img in imgs:

        # PIL.Image に変換して保存
        pil_img = TF.to_pil_image(img)
        pil_img.save(dir + '/' + category + '_' + file_name + '.png')

# 畳み込み層
conv = nn.Conv2d(
    in_channels=4,
    out_channels=3,
    kernel_size=1,
    stride=5,
    padding=0
)

conved_img = conv(img)

save_images(conved_img, 'conved')

print('畳み込み後')
print(conved_img.shape)
karnel_size = 256 , stride = 5
torch.Size([1, 4, 600, 1500])
畳み込み後
torch.Size([1, 3, 69, 249])
検証コード
import os
from PIL import Image, ImageFilter
import torch.nn as nn
import torch.nn.functional as F
from torchvision import transforms
import torchvision.transforms.functional as TF

# 画像の読み込み
img_path = 'images/test_01.png'
img = Image.open(img_path)
file_name = os.path.splitext(os.path.basename(img_path))[0]

# Tensor型へ変換
img = TF.to_tensor(img)

# ミニバッチの形に変換
img = img.reshape(1, img.shape[0], img.shape[1], img.shape[2])

print(img.shape)

# 画像の保存
def save_images(imgs, category):

    # 画像データの保存先
    dir = 'images'

    # ディレクトリの作成
    if not os.path.isdir(dir):
        os.makedirs(dir)

    for img in imgs:

        # PIL.Image に変換して保存
        pil_img = TF.to_pil_image(img)
        pil_img.save(dir + '/' + category + '_' + file_name + '.png')

# 畳み込み層
conv = nn.Conv2d(
    in_channels=4,
    out_channels=3,
    kernel_size=256,
    stride=5,
    padding=0
)

conved_img = conv(img)

save_images(conved_img, 'conved')

print('畳み込み後')
print(conved_img.shape)
padding | パディング
削減されれた解像度をパディングで埋めます。
パディングで埋められた部分に特徴量はないため、
埋めること自体に意味はないはず。
正確に端までスライドさせることに意味があるんだと思います。
下記は padding=(500, 1000) で行った際のものです。
conv = nn.Conv2d(
    in_channels=4,
    out_channels=3,
    kernel_size=16,
    stride=5,
    padding=(500, 1000)
)
パディングはデフォルトだとランダムな単色で埋まります。
padding_modeを設定することでパディングの内容を指定できます。

torch.Size([1, 4, 600, 1500])
畳み込み後
torch.Size([1, 3, 317, 697])
検証コード
import os
from PIL import Image, ImageFilter
import torch.nn as nn
import torch.nn.functional as F
from torchvision import transforms
import torchvision.transforms.functional as TF

# 画像の読み込み
img_path = 'images/test_01.png'
img = Image.open(img_path)
file_name = os.path.splitext(os.path.basename(img_path))[0]

# Tensor型へ変換
img = TF.to_tensor(img)

# ミニバッチの形に変換
img = img.reshape(1, img.shape[0], img.shape[1], img.shape[2])

print(img.shape)

# 画像の保存
def save_images(imgs, category):

    # 画像データの保存先
    dir = 'images'

    # ディレクトリの作成
    if not os.path.isdir(dir):
        os.makedirs(dir)

    for img in imgs:

        # PIL.Image に変換して保存
        pil_img = TF.to_pil_image(img)
        pil_img.save(dir + '/' + category + '_' + file_name + '.png')

# 畳み込み層
conv = nn.Conv2d(
    in_channels=4,
    out_channels=3,
    kernel_size=16,
    stride=5,
    padding=(500, 1000)
)

conved_img = conv(img)

save_images(conved_img, 'conved')

print('畳み込み後')
print(conved_img.shape)
その他の畳み込み層
ConvTranspose2d
Conv2d を使用すると画像サイズが小さくなりましたが、
ConvTrandpose2d ではサイズが大きくなります。
アップサンプリングで使用されます。
torch.Size([1, 4, 500, 1000])
畳み込み後
torch.Size([1, 4, 1000, 2000])
検証コード
import os
from PIL import Image, ImageFilter
import torch.nn as nn
import torch.nn.functional as F
from torchvision import transforms
import torchvision.transforms.functional as TF

# 画像の読み込み
img_path = 'images/test_00.png'
img = Image.open(img_path)
file_name = os.path.splitext(os.path.basename(img_path))[0]

# Tensor型へ変換
img = TF.to_tensor(img)

# ミニバッチの形に変換
img = img.reshape(1, img.shape[0], img.shape[1], img.shape[2])

print(img.shape)

# 画像の保存
def save_images(imgs, category):

    # 画像データの保存先
    dir = 'result_images'

    # ディレクトリの作成
    if not os.path.isdir(dir):
        os.makedirs(dir)

    for img in imgs:

        # PIL.Image に変換して保存
        pil_img = TF.to_pil_image(img)
        pil_img.save(dir + '/' + category + '_' + file_name + '.png')


# 転置畳み込み層
conv = nn.ConvTranspose2d(
    in_channels=4,
    out_channels=4,
    kernel_size=3,
    stride=2,
    padding=1,
    output_padding=1,
)
conved_img = conv(img)
save_images(conved_img, 'conved')
print('畳み込み後')
print(conved_img.shape)
画像サイズの計算
$$\Large O_h = S(I_h -1) - 2D + L(F_h - 1) + P + 1$$
$$\Large O_w = S(I_w -1) - 2D + L(F_w - 1) + P + 1$$
| \( I_h \) | 入力画像の高さ |
| \( F_h \) | フィルタの高さ |
| \( O_h \) | 出力画像の高さ |
| \( D \) | パディング幅 |
| \( L \) | 間隔 |
| \( I_w \) | 入力画像の横幅 |
| \( F_w \) | フィルタの横幅 |
| \( O_w \) | 出力画像の横幅 |
| \( P \) | アウトプットパディング |
| \( S \) | ストライド幅 |
コードにすると下記になります。
# 転置畳み込みの画像サイズ計算
def calc_transposeConv(size, kernel_size, stride=1, padding=0, output_padding=0, dilation=1):
    output_size = (size - 1) * stride -2 * padding + dilation * (kernel_size - 1) + output_padding + 1
    return output_size
torch.Size([1, 4, 500, 1000])
畳み込み後
torch.Size([1, 4, 1002, 2002])

計算結果 ----------------------------------

縦 :  1002
横 :  2002
検証コード
import os
from PIL import Image, ImageFilter
import torch.nn as nn
import torch.nn.functional as F
from torchvision import transforms
import torchvision.transforms.functional as TF

# 画像の読み込み
img_path = 'images/test_00.png'
img = Image.open(img_path)
file_name = os.path.splitext(os.path.basename(img_path))[0]

# Tensor型へ変換
img = TF.to_tensor(img)

# ミニバッチの形に変換
img = img.reshape(1, img.shape[0], img.shape[1], img.shape[2])

print(img.shape)

# 画像の保存
def save_images(imgs, category):

    # 画像データの保存先
    dir = 'result_images'

    # ディレクトリの作成
    if not os.path.isdir(dir):
        os.makedirs(dir)

    for img in imgs:

        # PIL.Image に変換して保存
        pil_img = TF.to_pil_image(img)
        pil_img.save(dir + '/' + category + '_' + file_name + '.png')


# 転置畳み込みの画像サイズ計算
def calc_transposeConv(size, kernel_size, stride=1, padding=0, output_padding=0, dilation=1):
    output_size = (size - 1) * stride -2 * padding + dilation * (kernel_size - 1) + output_padding + 1
    return output_size


width  = 1000
height = 500
in_channels = 4
out_channels = 4
kernel_size = 3
stride = 2
padding = 1
output_padding = 1
dilation = 2


# 転置畳み込み層
conv = nn.ConvTranspose2d(
    in_channels=in_channels,
    out_channels=out_channels,
    kernel_size=kernel_size,
    stride=stride,
    padding=padding,
    output_padding=output_padding,
    dilation = dilation
)


conved_img = conv(img)
save_images(conved_img, 'conved')
print('畳み込み後')
print(conved_img.shape)

print('\n計算結果 ----------------------------------\n')


print('縦 : ', calc_transposeConv(
    height,
    in_channels,
    out_channels,
    kernel_size,
    stride,
    padding,
    output_padding,
    dilation
))

print('横 : ', calc_transposeConv(
    width,
    in_channels,
    out_channels,
    kernel_size,
    stride,
    padding,
    output_padding,
    dilation
))
プーリング層
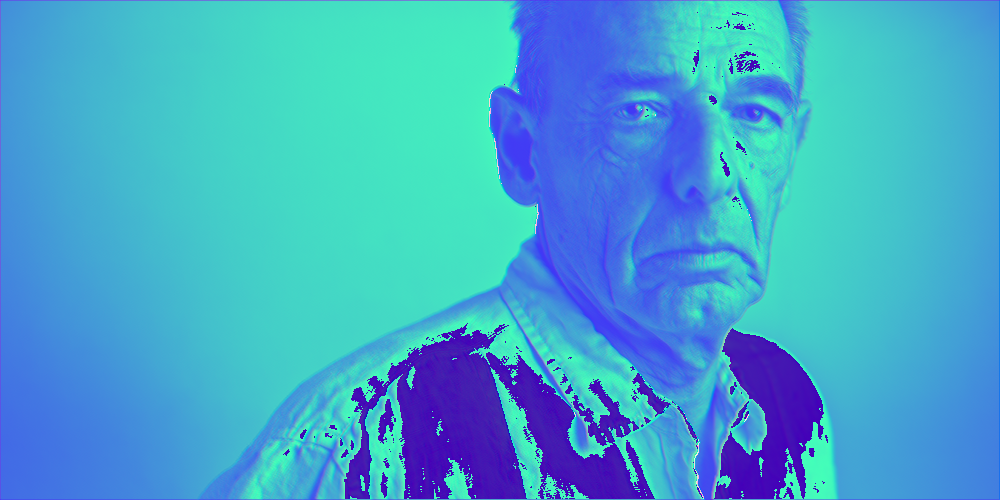
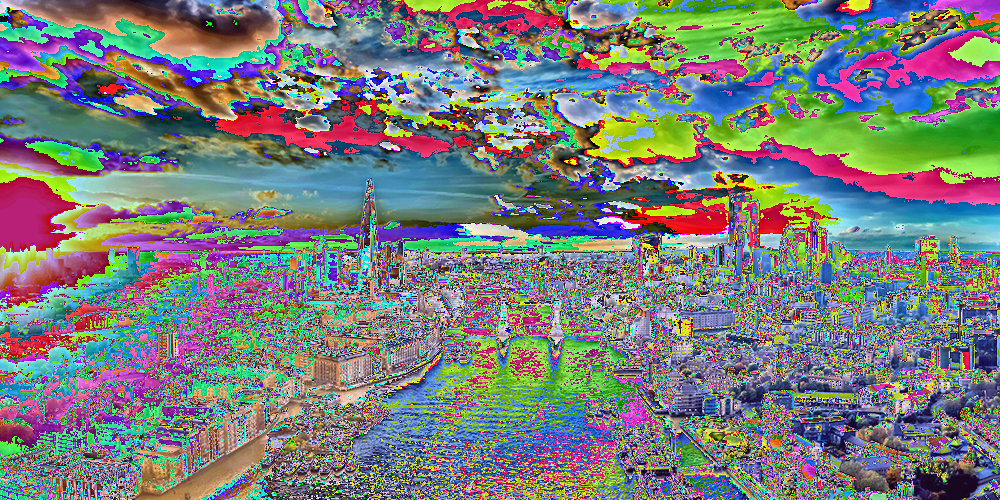
MaxPool2d
MaxPooling は値の高いピクセルをピックします。
そのため、値の小さい情報が少なくなり、値の大きい情報が補強されます。
サンプル画像だと畳み込みを行っていないため、明度がそのままピクセルの値になっています。
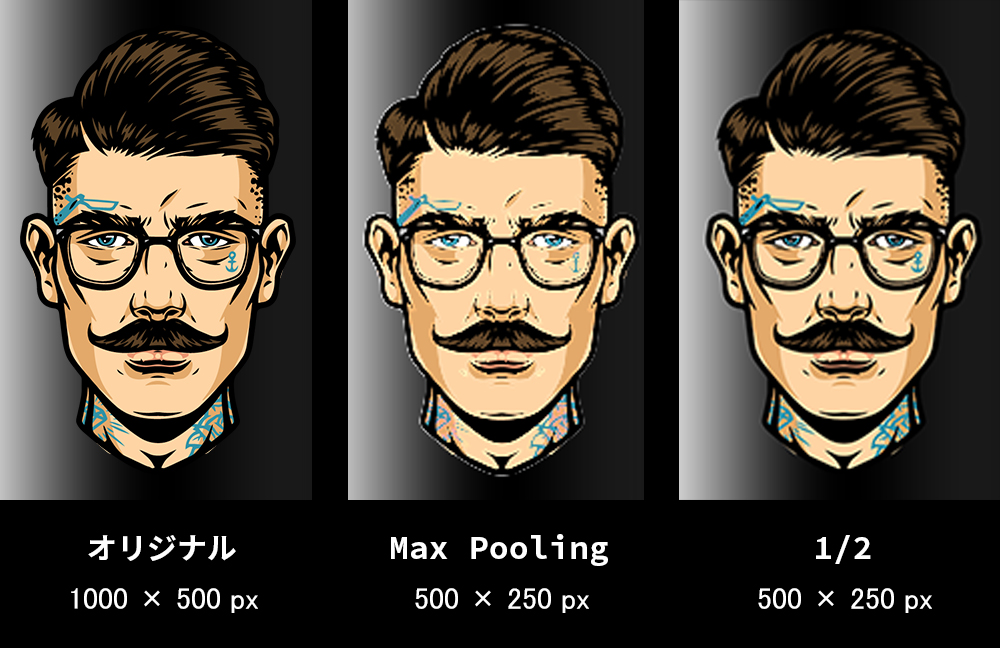
印象としては、明度の高い部分を保持したまま明度の低いピクセルを削除し、その結果全体のサイズが小さくなっているイメージです。
髪の毛のハイライトなど明度が高い部分は補強され、シワなど明度の低い部分は情報が薄くなっています。
実際には畳み込みの段階で特徴量が数値として現れている状態です。
特徴のある部分の数値が高いため、その部分を補強してその他の情報量を抑える働きをしています。

torch.Size([1, 4, 500, 1000])
プーリング後
torch.Size([1, 4, 250, 500])
検証コード
import os
from PIL import Image, ImageFilter
import torch.nn as nn
import torch.nn.functional as F
from torchvision import transforms
import torchvision.transforms.functional as TF

# 画像の読み込み
img_path = 'images/test_00.png'
img = Image.open(img_path)
file_name = os.path.splitext(os.path.basename(img_path))[0]

# Tensor型へ変換
img = TF.to_tensor(img)

# ミニバッチの形に変換
img = img.reshape(1, img.shape[0], img.shape[1], img.shape[2])

print(img.shape)

# 画像の保存
def save_images(imgs, category):

    # 画像データの保存先
    dir = 'result_images'

    # ディレクトリの作成
    if not os.path.isdir(dir):
        os.makedirs(dir)

    for img in imgs:

        # PIL.Image に変換して保存
        pil_img = TF.to_pil_image(img)
        pil_img.save(dir + '/' + category + '_' + file_name + '.png')


# MaxPooling
pool = nn.MaxPool2d(
    kernel_size = 2,
    stride = 2
)

pooled_img = pool(img)

save_images(pooled_img, 'pooled')

print('プーリング後')
print(pooled_img.shape)
MaxUnpool2d
MaxUnpool は MaxPool を行った後に実行するクラスです。
マックスプーリングの際に小さくなったサイズを元に戻します。
全く同じに戻るかというとそんなことはないです。4チャンネルの場合、差分はアルファチャンネルで補完されます。
これを使用しているモデルにまだ出会ってないので具体的な用途はわかりません。
単純にサイズを戻すだけなら ConvTranspose2d を使ったアップサンプリングでいいような気がします。
使い方としては Max Pooling を行う際にreturn_indices=Trueを加えます。
# MaxPooling
pool = nn.MaxPool2d(
    kernel_size = 2,
    stride = 2,
    return_indices=True
)
これを指定した場合は戻り値が二つになるので注意してください。
pooled_img, indices = pool(img)
unpool_img = unpool(pooled_img, indices)
その後 MaxUnpool に戻り値を両方渡すとプーリング前と同じサイズの画像が得られます。

torch.Size([1, 4, 500, 1000])
MaxUnpool2d後
torch.Size([1, 4, 500, 1000])
検証コード
import os
from PIL import Image, ImageFilter
import torch.nn as nn
import torch.nn.functional as F
from torchvision import transforms
import torchvision.transforms.functional as TF

# 画像の読み込み
img_path = 'images/test_00.png'
img = Image.open(img_path)
file_name = os.path.splitext(os.path.basename(img_path))[0]

# Tensor型へ変換
img = TF.to_tensor(img)

# ミニバッチの形に変換
img = img.reshape(1, img.shape[0], img.shape[1], img.shape[2])

print(img.shape)

# 画像の保存
def save_images(imgs, category):

    # 画像データの保存先
    dir = 'result_images'

    # ディレクトリの作成
    if not os.path.isdir(dir):
        os.makedirs(dir)

    for img in imgs:

        # PIL.Image に変換して保存
        pil_img = TF.to_pil_image(img)
        pil_img.save(dir + '/' + category + '_' + file_name + '.png')


# MaxPooling
pool = nn.MaxPool2d(
    kernel_size = 2,
    stride = 2,
    return_indices=True
)

# MaxUnpool
unpool = nn.MaxUnpool2d(
    kernel_size=2,
    stride=2
)

pooled_img, indices = pool(img)

unpool_img = unpool(pooled_img, indices)

save_images(unpool_img, 'MaxUnpool2d')

print('MaxUnpool2d後')
print(unpool_img.shape)
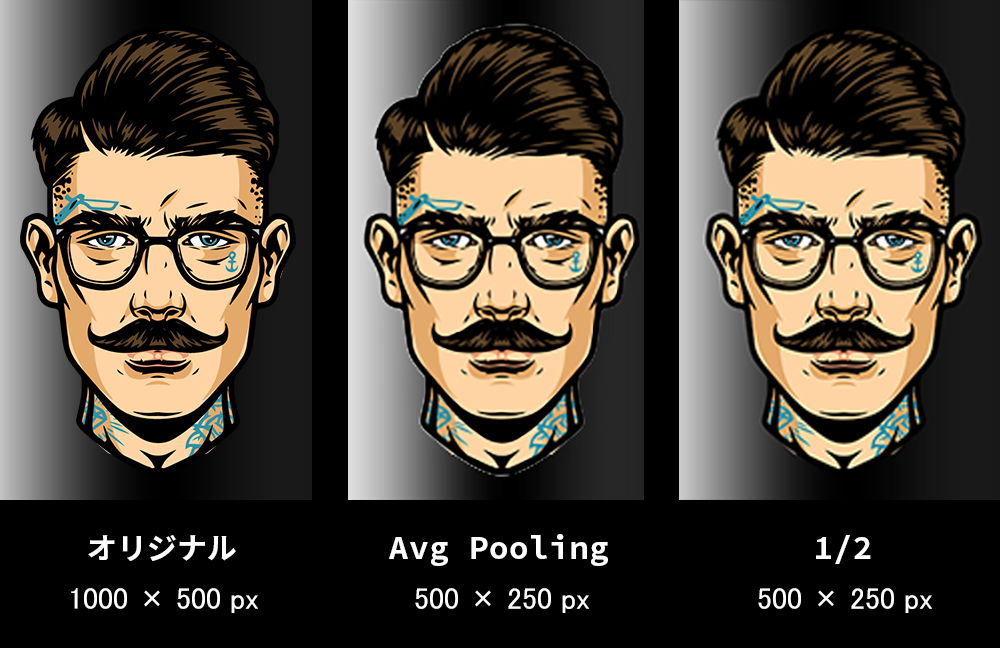
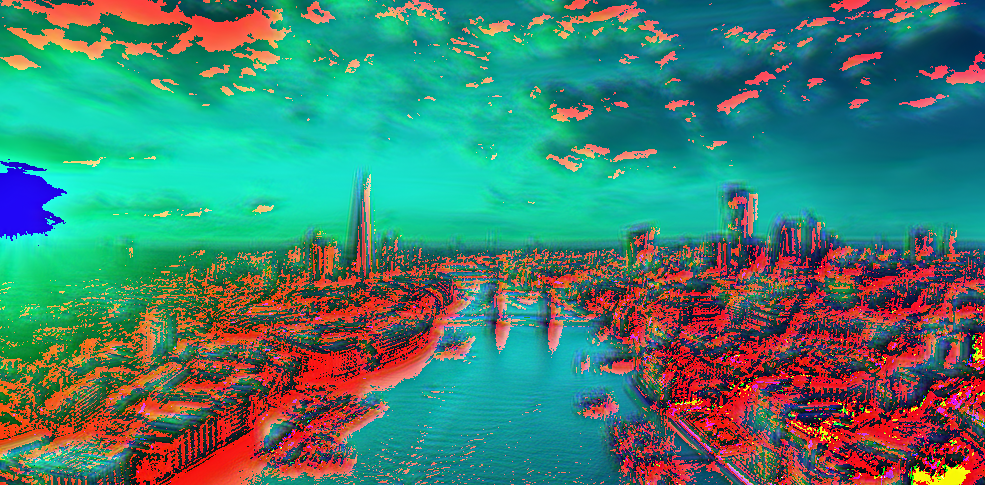
AvgPool2d
MaxPooling は明度が高い値を保存するのに対し、
AveragePooling は平均値を保存します。
そのため、単純に 1/2 した画像に近いプーリングを行います。
果たしてこれに意味はあるのか。
これもまだ使ってるモデルに出会ってないので使い所がわかりません。
検証コード
import os
from PIL import Image, ImageFilter
import torch.nn as nn
import torch.nn.functional as F
from torchvision import transforms
import torchvision.transforms.functional as TF

# 画像の読み込み
img_path = 'images/test_00.png'
img = Image.open(img_path)
file_name = os.path.splitext(os.path.basename(img_path))[0]

# Tensor型へ変換
img = TF.to_tensor(img)

# ミニバッチの形に変換
img = img.reshape(1, img.shape[0], img.shape[1], img.shape[2])

print(img.shape)

# 画像の保存
def save_images(imgs, category):

    # 画像データの保存先
    dir = 'result_images'

    # ディレクトリの作成
    if not os.path.isdir(dir):
        os.makedirs(dir)

    for img in imgs:

        # PIL.Image に変換して保存
        pil_img = TF.to_pil_image(img)
        pil_img.save(dir + '/' + category + '_' + file_name + '.png')


# MaxPooling
pool = nn.AvgPool2d(
    kernel_size = 2,
    stride = 2
)

pooled_img = pool(img)

save_images(pooled_img, 'AvgPool')

print('プーリング後')
print(pooled_img.shape)
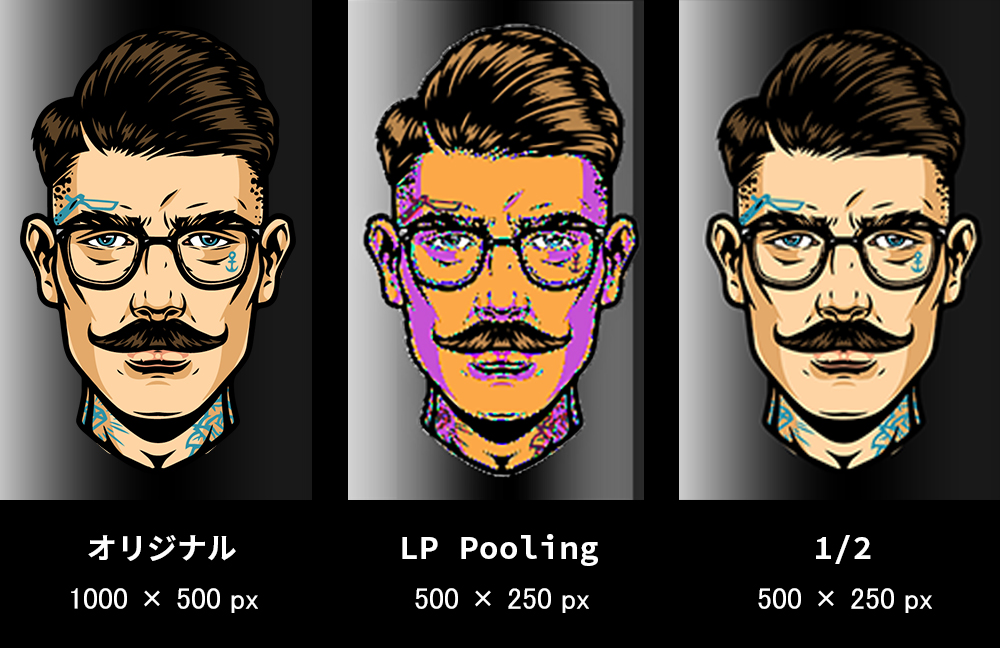
LPPool2d
LPPool2d は第一引数で norm_type を渡します。
名前や結果から察するにバッチ正規化を行っているように思うんですが、
BatchNorm2d のようにチャンネルを渡しているわけではなさそうです。
norm_type に関するドキュメントが見つからないためよくわかりません。
検証コード
import os
from PIL import Image, ImageFilter
import torch.nn as nn
import torch.nn.functional as F
from torchvision import transforms
import torchvision.transforms.functional as TF

# 画像の読み込み
img_path = 'images/test_00.png'
img = Image.open(img_path)
file_name = os.path.splitext(os.path.basename(img_path))[0]

# Tensor型へ変換
img = TF.to_tensor(img)

# ミニバッチの形に変換
img = img.reshape(1, img.shape[0], img.shape[1], img.shape[2])

print(img.shape)

# 画像の保存
def save_images(imgs, category):

    # 画像データの保存先
    dir = 'result_images'

    # ディレクトリの作成
    if not os.path.isdir(dir):
        os.makedirs(dir)

    for img in imgs:

        # PIL.Image に変換して保存
        pil_img = TF.to_pil_image(img)
        pil_img.save(dir + '/' + category + '_' + file_name + '.png')


# LPPooling
pool = nn.LPPool2d(
    2,
    kernel_size = 2,
    stride = 2
)

pooled_img = pool(img)

save_images(pooled_img, 'LPPool')

print('プーリング後')
print(pooled_img.shape)
AdaptiveMaxPool2d
pool = nn.AdaptiveMaxPool2d(
    (500,500)
)
画像サイズを渡し、その画像サイズになるようにプーリングを行います。
AdaptiveAvgPool2d も同様にサイズを指定するプーリングです。
検証コード
import os
from PIL import Image, ImageFilter
import torch.nn as nn
import torch.nn.functional as F
from torchvision import transforms
import torchvision.transforms.functional as TF

# 画像の読み込み
img_path = 'images/test_00.png'
img = Image.open(img_path)
file_name = os.path.splitext(os.path.basename(img_path))[0]

# Tensor型へ変換
img = TF.to_tensor(img)

# ミニバッチの形に変換
img = img.reshape(1, img.shape[0], img.shape[1], img.shape[2])

print(img.shape)

# 画像の保存
def save_images(imgs, category):

    # 画像データの保存先
    dir = 'result_images'

    # ディレクトリの作成
    if not os.path.isdir(dir):
        os.makedirs(dir)

    for img in imgs:

        # PIL.Image に変換して保存
        pil_img = TF.to_pil_image(img)
        pil_img.save(dir + '/' + category + '_' + file_name + '.png')


# AdaptiveMaxPool2d
pool = nn.AdaptiveMaxPool2d(
    (500,500)
)

pooled_img = pool(img)

save_images(pooled_img, 'AdaptiveMaxPool2d')

print('プーリング後')
print(pooled_img.shape)
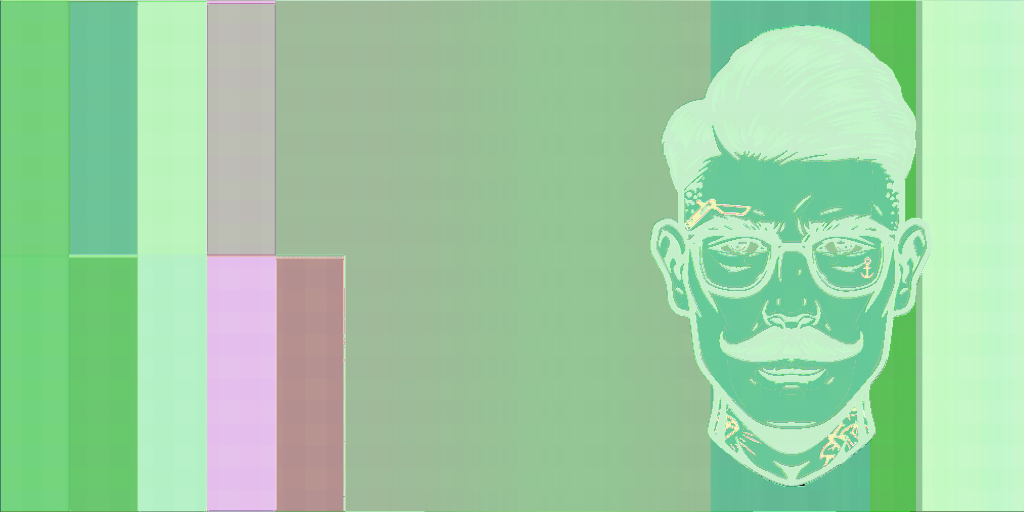
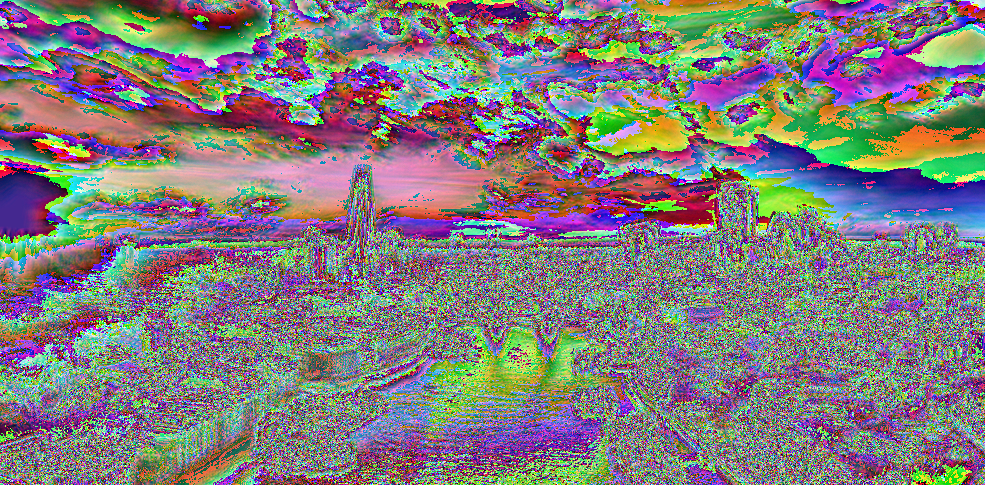
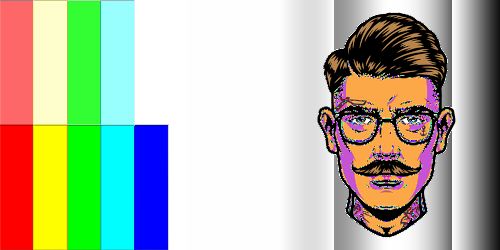
torch.nn.BatchNorm2d | バッチ正規化
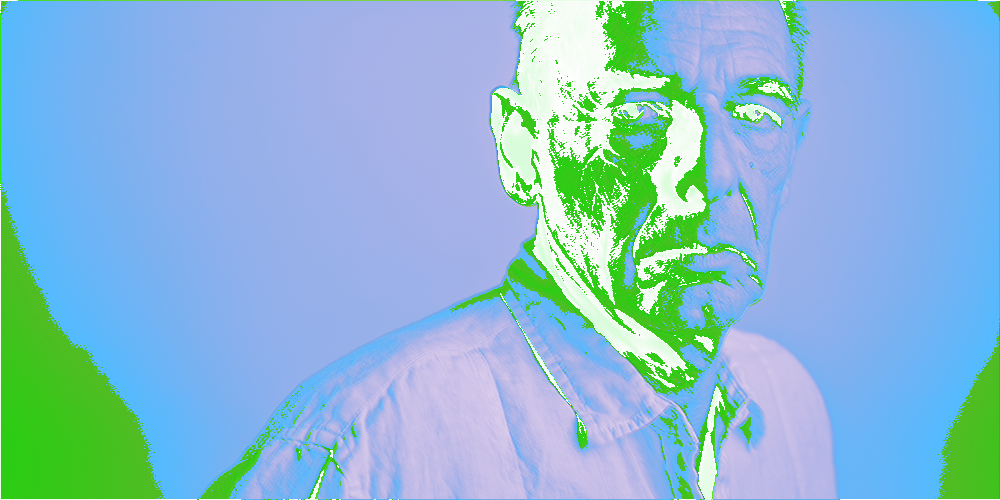
バッチ正規化を行うクラスです。
バッチ正規化は引数に入力画像のチャンネル数を渡します。
nn.BatchNorm2d(32)
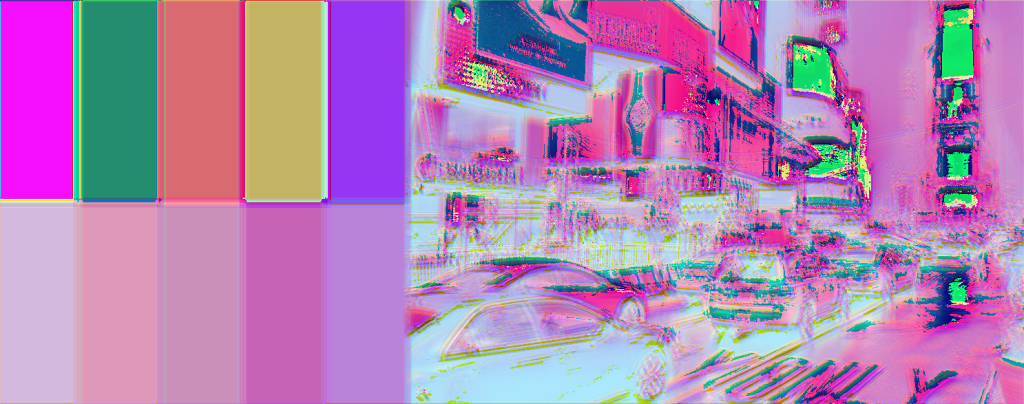
バッチ正規化はある層からの出力を平均が0で分散が1となるように出力を加工し、次の層への入力とします。
これを画像で表すと上記のようになります。
グラデーションを消して境界線をはっきりさせています。
torch.Size([1, 3, 500, 1000])
バッチ正規化後
torch.Size([1, 3, 500, 1000])

検証コード
import os
from PIL import Image, ImageFilter
import torch.nn as nn
import torch.nn.functional as F
from torchvision import transforms
import torchvision.transforms.functional as TF

# 画像の読み込み
img_path = 'images/test_05.png'
img = Image.open(img_path)
file_name = os.path.splitext(os.path.basename(img_path))[0]

# Tensor型へ変換
img = TF.to_tensor(img)

# ミニバッチの形に変換
img = img.reshape(1, img.shape[0], img.shape[1], img.shape[2])

print(img.shape)

# 画像の保存
def save_images(imgs, category):

    # 画像データの保存先
    dir = 'images'

    # ディレクトリの作成
    if not os.path.isdir(dir):
        os.makedirs(dir)

    for img in imgs:

        # PIL.Image に変換して保存
        pil_img = TF.to_pil_image(img)
        pil_img.save(dir + '/' + category + '_' + file_name + '.png')

# # バッチ正規化
batch = nn.BatchNorm2d(
    3
)

batched_img = batch(img)

save_images(batched_img, 'batched')

print('バッチ正規化後')
print(batched_img.shape)
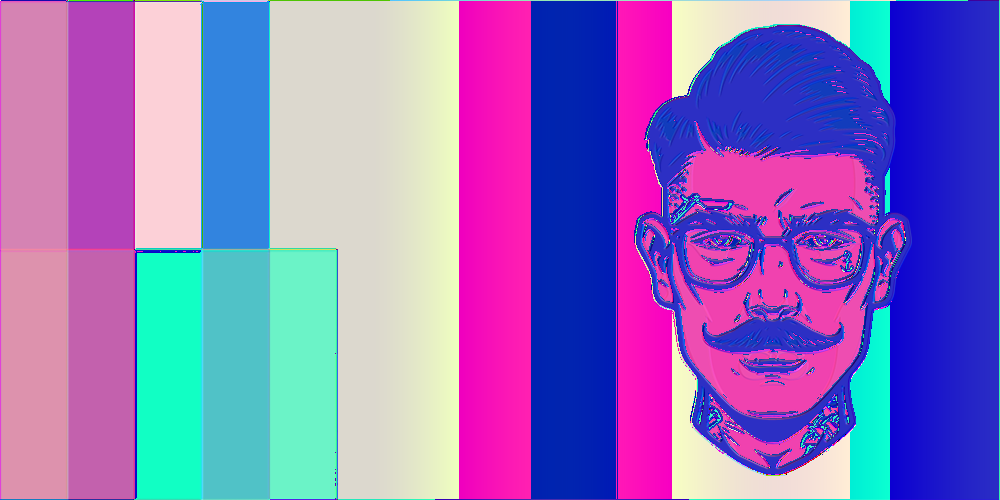
カーネル 16で畳み込み → バッチ正規化
↑ 畳み込み後
↓ バッチ正規化後
torch.Size([1, 3, 500, 1000])
畳み込み後
torch.Size([1, 3, 485, 985])
バッチ正規化後
torch.Size([1, 3, 485, 985])
検証コード
import os
from PIL import Image, ImageFilter
import torch.nn as nn
import torch.nn.functional as F
from torchvision import transforms
import torchvision.transforms.functional as TF

# 画像の読み込み
img_path = 'images/test_05.png'
img = Image.open(img_path)
file_name = os.path.splitext(os.path.basename(img_path))[0]

# Tensor型へ変換
img = TF.to_tensor(img)

# ミニバッチの形に変換
img = img.reshape(1, img.shape[0], img.shape[1], img.shape[2])

print(img.shape)

# 画像の保存
def save_images(imgs, category):

    # 画像データの保存先
    dir = 'images'

    # ディレクトリの作成
    if not os.path.isdir(dir):
        os.makedirs(dir)

    for img in imgs:

        # PIL.Image に変換して保存
        pil_img = TF.to_pil_image(img)
        pil_img.save(dir + '/' + category + '_' + file_name + '.png')


# 畳み込み層
conv = nn.Conv2d(
    in_channels=3,
    out_channels=4,
    kernel_size=16,
    stride=1,
    padding=0
)
conved_img = conv(img)

save_images(conved_img, 'conved')

print('畳み込み後')
print(conved_img.shape)


# バッチ正規化
batch = nn.BatchNorm2d(
    4
)

batched_img = batch(conved_img)

save_images(batched_img, 'batched')

print('バッチ正規化後')
print(batched_img.shape)


